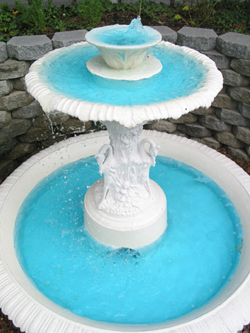
 It is time to run a hose through that old fountain you have sitting in your yard. The darned thing has not been fired up since… When was it? Was it last season? Hmmm, maybe it was the season before. Bah! Who cares? It’s time to fire it up and bask in its beauty!
Now that you have got the fountain full of water, it is time to pull out the lawn furniture, something to drink and… Uh oh! The fountain is leaking! Grumbling as you drag the lawn furniture back inside and put the lemonade away, you realize you have no idea how you are going to fix this pesky leak in your fountain.
Find the leak
Not to worry. Fixing a leak in a fountain is just as easy as fixing a leak in any other water feature. First, you have to determine where the leak is. Most yard fountains are made up of several preformed, concrete tiers and a visual inspection of the fountain should tell you that pretty quickly.
Cracks can form in concrete fountains if left out during the cold winter months. This usually happens when water that has been left in the fountain was allowed to freeze causing the concrete to expand past its capacity.
Start at the top tier and look at the underside of it. Does the concrete look damp? Are there any visible signs of cracking in the concrete? Inspect each tier and see if any of these conditions exist. Just because you find one culprit doesn’t mean there isn’t another. Inspect the whole fountain for these same conditions.
Let’s assume for a minute that you did not find anything with that cursory inspection. Tiered fountains are usually constructed by stacking these preformed concrete basins on top of one another. Then in the center of them, there might be a hole that travels the standing length for which the electrical wiring can run.
If this is the case and you have not found any indications of a leak, then the problem may be at the base of one of these tiers where the next tier sits upon the first. If you remove a tier from the top of another tier, you’ll usually find a rubber type of cork that has a hole in the middle.
The wiring runs through the hole and when the top tier is in place it sandwiches the rubber between the two tiers making a water-tight seal. Check to see if that rubber cork has deteriorated. Check each tier’s rubber cork as well. If any are damaged, replace them and check for leaks again.
With that said, it’s probably not a bad idea to check these from time to time anyway. However, if you had found these to be in good shape and the problem was a crack in one of the tiers then you are going to have to correct that issue.
Fix the crack
Fixing a crack in concrete is not a big deal. With a few simple tools, you can have a simple repair done in a couple of hours. Evaluate the crack and try to determine if it needs to be ground out. By grinding the crack out, you allow the repair material to bond to each facing side of the crack which will, in essence, act as a permanent stitch in the concrete.
I usually use a small 4-inch angle grinder with a concrete cutting wheel attached. Wear gloves, safety glasses (maybe even a safety face shield and possibly a dust mask when repairing concrete. Small bits of stone will fly through the air and you do not want to injure an eye or even your face.
Cut into the crack and make a slight groove. For hairline cracks, the groove only needs to be about ¼ inch deep. Follow the crack as far as it goes. Once the crack has been grooved, use air to blow out any debris from the crack.
At this point, you can use Pond Shield epoxy to stitch the crack back together. Mix a small amount of Pond Shield and over thin it so that it has a more watery consistency. Then brush that into the crack and allow the concrete to wick up the mixture. After that mixture has started to set up, mix the appropriate amount, and use a putty knife to press the coating into place. Once the coating begins to set up, use a small roller to coat the entire inside surface of the tier.
Waterproof the fountain
To make things uniform, coat each tier and any areas that will be submerged by water. Once complete check, for leaks and touch up as necessary. Your leaky fountain will now be leak-free and a lot better looking too!
The Pond Shield coating will also make things easier for you to clean. If your fountain collects any muck or algae, simply wipe it clean with a terry cloth rag.


